How to prepare your facility for the app

Know the app more
Get to know the app and neat functionalities that you can use.

Plan lend-out methods
Figure out what you personally need and how our app can help you.
Create scannable codes
Check out how you can make lending out easier with printable codes to scan.

There are multiple ways to approach a lend out system, and it is important that you figure out what fits best for your case. I’ve seen multiple sharing communities that has failed, for many different reasons. I’ve also seen normal lend-out cases in universities, between colleagues in businesses and also business to customer lend-outs, that has lost overview over their things, lend-outs, and more. Here I will introduce you to a bunch of functionalities that the app has ready for you, so that you can be sure to not get into any problems going forward.
Learn more about the app
First and foremost, the app’s layout and how you’re using it is key to efficiency.
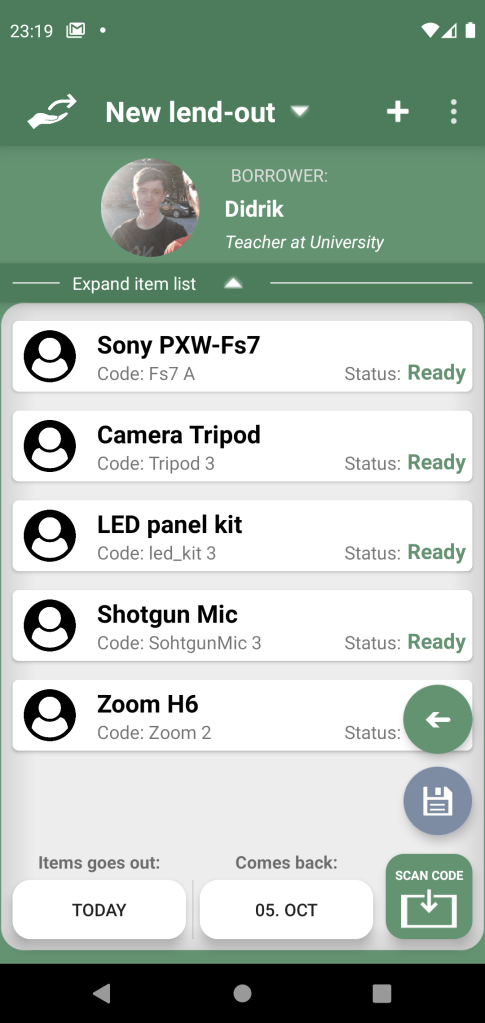
The app is designed with 3 important pages: System list, Lend-out list, and New Lend-out page.
Systems list page hosts three lists: Item list, borrower list, and sub-item list. Basically just lists of all the things or people involved with your lend-out facility.
THE FUNDAMENTALS
When you lend out stuff, you fundamentally need to do 4 things. Add a borrower, add items, and add a date onn retrieval. On top of this though, you can add other tools and requirements, if desired:
- Check-list to go through before submitting
- Contract that the borrower have to sign
- Take and save image of the things for visual proof
- Send e-mail to borrower about the lend-out, optionally also the contract
These four things are described more further down on this page.
STATUSES
Items (and sub-items) has the following potential statuses:
Ready / Returned – Means it is ready to be lent out at any time.
Repair – Means there is something wrong or missing, and it needs to be fixed.
Missing – The item is gone, but may be found at a later date.
Removed – The item has been completely removed from the system.
Lent to (name).
When stuff are retrieved back, the item will return to the previous status. You can view a list of status history in the item dialog dropdown menu. In borrower’s info, you will always either find their current lend-out or their previous one. You can also see all their previous statuses in the dropdown menu.
SUB-ITEMS
Sub-items are smaller things that can be included within an Item. You can put sub-items into items for a hierarchical management/overview of things – if you for example have a camera kit, the sub-items for that kit could be:
- The camera
- A couple of lenses
- 3 batteries
- A charger
- Usb Cable
- SD card
This will not only show you whats in the item, but this can also be used as a check-list for either the borrower or the one lending out, upon lend out:
CHECK-LIST
Sub-items has some neat functionality. If you wish, you could toggle a checklist function to go through the list of sub-items within an item during lend-out. This would make it easy for you to figure out if the items you lend out are complete and ready, or if something is missing or needs to be repaired.
Let’s say you are receiving things back from a borrower. If the kit is missing something, you can assign the sub-item as “Missing”, and the item will automatically get the status as “Repair”. Next time you lend out stuff, and you scan this item, you’ll see what is missing. You can then choose yourself whether it is important enough to change the item to another one, to find a replacement sub-item, or you could still lend it out with that status. Thanks to the check-list, you would know about it before giving anything away.
More importantly is to figure out who’s responsible. When you retrieve things back from a borrower, and you go through the checklist, if you find something that is missing that was not missing before, you can be sure it was this borrower that has lost it, and not by some mistake on lend-out. This is why we really recommend using this functionality.
I have personally tried to run a lend-out system without such a check-list, and when something is missing on retrieval I can’t remember whether I forgot to make sure the sub-item was in the item, if I took it out before lend-out or if the previous borrower had lost it, etc. Being completely sure about this is important when expensive things go missing. Here is another neat function to make sure that you can take legal action against a borrower:
CONTRACTS
If you wish, you could even add contracts to the app, that the borrower must sign on lend-out. There, you can specify what happens if something is missing or broken. Perhaps they have to pay for it or replace it, maybe just a small fee if there is insurance, etc. On lend-out they’ll have to sign digitally. The contract can be signed either on the lender’s device, or be sent to the borrower on mail to sign on their device. The contract can either way later be sent to the borrower as their copy, as well as the full list of things that they have confirmed that they have received from the lender.
IMAGE PROOF
Another thing you can do to that is faster, but still better than nothing, is to take a picture of the stuff you’re lending out. You could do this instead of check-list or contracts, or together with them for another legal proof. Using none of these tools one could easily say a mistake were made on the lender’s side, using check lists and contracts they could still say the same (but it is their fault), but with images they can’t deny it. If both image proof and contracts are toggled the images would automatically be included in the contract as well as be saved on your phone.
PREPARE QR AND BARCODES
For efficiency, you can use QR codes and barcodes (and even nfc) to find the item or borrower in the system easier, both when just looking in the systems page, or during lend-out.The icon is bottom right, and says “Scan code”. When you initialize the app and have populated it with items and borrowers, you need to dedicate some hours to plan, print and place the codes on the items. Things you need to think about is:
- Where to place the code.
- How to attach the code to the items.
- Whether to use barcode or QR code.
- Sizes of codes. How much space do you have on the code?
Placement of the code is important for efficiency. If you’re lending out 20 things, you don’t want to constantly be looking for the code because it is at random places, hidden in a pocket or at the back side. During lend-out i recommend to find all the stuff for the lend-out first (perhaps you have a list of things they want to borrow) and line them up so all the codes are visible. Then, you find your device and app and scan all of them. Switching between finding stuff and scanning them can take more time, and even give a higher chance for accidentally drop the device and potentially crack the screen.
How you attach the code to the item is also a good thing to plan ahead. You may want to buy different materials dependent on how you do it.
When you have figured out where to place the code, and how you attach it, you can decide whether to use QR or Barcode. There are multiple reasons to choose one over the other, here are some of them:
- QR codes are known to be links to websites
- Barcodes can only be scanned horizontally. QR codes can be scanned from all directions
- Barcodes have small lines packed together, since it is one dimensional. Therefore QR codes can either have more information in it, or it can be much smaller than barcode.
- Barcode is best in a 2:1 ratio, while QR code is 1:1 ratio. (In terms of vertical and horizontal size)
- With a subscription you can use the QR code as a link to a webpage with information about the item, as well as scannable for the app during lend-out. Neat!
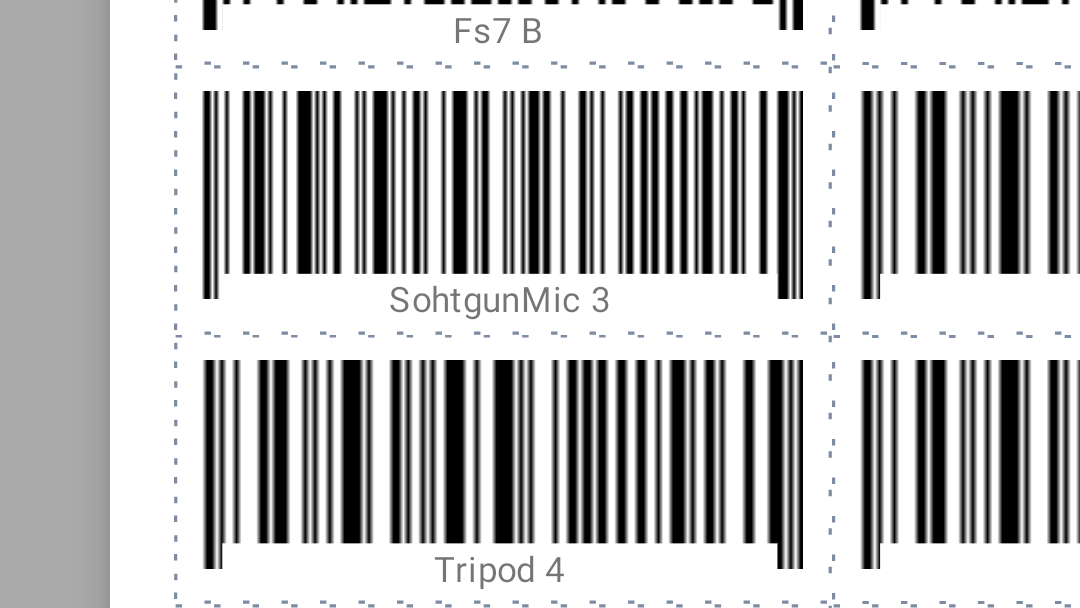
Keep in mind, if you want to include text like the name or code of the item, the QR code layout would be a little larger vertically to make space for that. With barcode, the text can be overlayed like in the image shown to the right.
Then there is the sizes of the codes. There is a limit to how small you can make things and how much information there can be in a barcode and QR before the phone camera is unable to read it. The general rule is, keep the item code as short as possible on creation, so the QR and barcode can be as small as possible. The bigger the better for the phone and your efficiency – the easier it is to read for your phone, the faster it will scan the code.
PRINT QR AND BARCODES
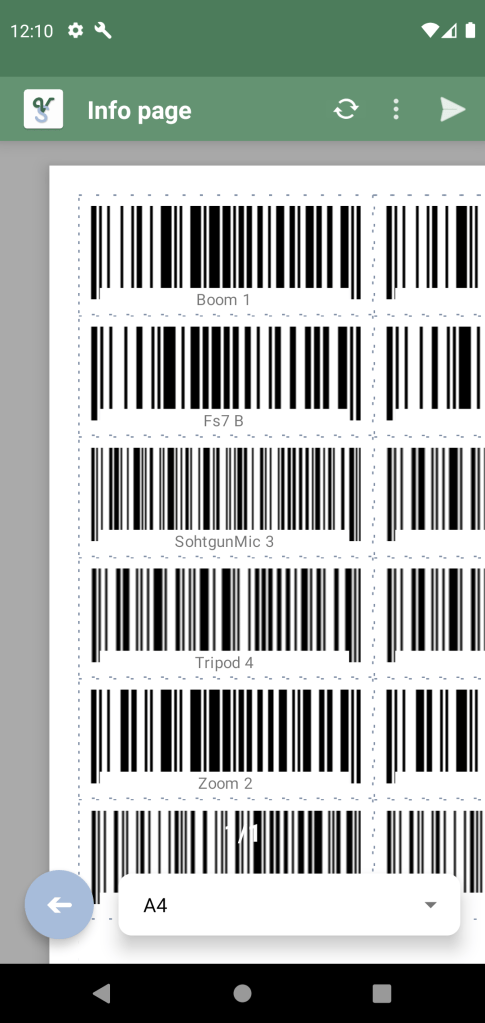
Now you may be thinking, where and how can I make and print all these codes? Don’t worry, we got you! The VolunShare app has its own page just for printing out QR and barcodes to your desired sizes. Just plot in the information and paper size, and let the app do the rest. You can then print the populated papers straight from the app!
Simply go to the System list, choose what items or borrowers you want to export. You’ll find the “Select Multiple” button in the dropdown menu in the top right, and in “Select opts..” -> “Export as..” -> then choose “QR document” or “Barcode document”. Doesn’t really matter which since you can change each individually to either QR or Barcode later, but you can choose the one you want to use the most. You can then also edit each individual sizes, whether you want text, if you want scissor lines, etc.
To learn more how to use that page, click here.
NFC CARDS
But that is not all! We have also made it possible for you to use NFC.
You may not know, but many cards can be scanned by just holding it close to your device, if your device has NFC support. To check if your device have NFC, you could search for NFC in your phone’s settings. If it is there, then turn it on. This may drain battery, so you could turn it on and off whenever you use the app. Android phones has a toggle function at the phones top drop down menu together with Wi-Fi, bluetooth, flashlight etc. You may have to add the icon to that menu yourself.
Whenever you lend-out next time, when you scan a person’s card you can assign it to a person, and they will from then on be automatically added to the lend-out on when scanned. No more need for searching and finding the borrower in the system.
We lately also found another cool feature with NFC technology. If you already have started using apple’s AirTags to GPS track your stuff (If they are expensive) you can also use them to scan into the lend-out without using the camera and QR or Barcode. They have NFC technology, just like cards. While you may want to hide the AirTag in the item somewhere, the phone just needs to be held close to the AirTag, like on the outside of the case or bag. I recommend placing a NFC icon wherever the best position is to scan the AirTag. We have not added this functionality to the app yet (and the app is only for android right now). Let us know if you want this functionality.
Populate the app with your info
So, now that you know a little about some of the functionalities of the app, you can decide which ones to use, and what you need to prepare. There are some things that you should think about in advance:
If you want to use Barcodes / QR codes, the item codes should be as short as possible. The codes are mostly just something for the app to distinguish between each item, like an ID. But the shorter the code is, the easier it will be for the phone to scan the QR or Barcode.
If you want to have a check-list on lend-out, you need to add sub-items, and then assign those sub-items to each of those items.
If you don’t want to have a check-list, you may not need to add sub-items to each item. Unless you personally want to have that overview. You could also just write in the description of each item what those include, rather than making a list. Just a recommendation to save you time. You can easily add sub-items at a later date, if you figure out lists and check-lists will be better.
If you have a lot of borrowers and items you want to add to the system, it might be easier to prepare an excel sheet or csv / txt file with semi-colon separated values. You can then import that into the app from the settings page. What to remember here is that there are some required values, and required formatting. For more information on how to import stuff to the app’s database, click here.
After importing the stuff to database, you’ll need to create the QR and Barcodes, if you wish to use that. To learn more on how to do that, click here.
