Import stuff to database
Here is a little tutorial on how to import stuff to the app’s database. There are multiple things to keep in mind.
First of all, this is information you need in your sheets or comma separated values when importing:
Information you need for import
Items

Needed:
- Name
- Code (unique)
- Category
Optional:
- Info
- Amount
- Status
- Date added
- Date last used
- Sub-Item list
Borrowers

Needed:
- Name
Optional:
- Phone
- Association
- Borrower code (unique)
- Date added
- Date of last borrow
- Number of times lent to
Sub-Items

Needed:
- Name
- Code (unique)
Optional:
- Info
- Amount
- Status
- Parent code
- Date added
- Date last used
- Sub-item list
Lend-outs
Needed:
- Name
Optional:
- Lend-out code (unique)
- List of items
- Date lent out
- Date of return
- Status
- Info about lend-out
- User code (the lender/user of the app)
To-dos

Needed:
- Title
- Description
Optional:
- Todo code (unique)
- Checked (true/false)
- Date checked
- Meta-info
- Parent code (e.g. item code)
- User code (the lender/user of app)
Statuses

Needed:
- Item code
- Borrower code
- Type of status or lendout code
- Date start
- Date end
Optional:
- Description
- Mode
- User code (the lender/user of app)
- Status code (unique)
Further explanations
Items
Items are the thing you lend out. They can be bags of things, a kit of multiple things or just one specific thing alone.
Sub-items
Sub-items are the sub-category of items. If the items you have can be broken down into more items, it can be nice to use the sub-item functionality. If you want to, yo can use the sub-item list as a check-list when creating a lend-out. For more information about check lists, click here.
Borrowers
A list of the borrowers you may have. You can add borrowers in System list page, or while making a lend-out. You could also import a list of people at once in the Settings page.
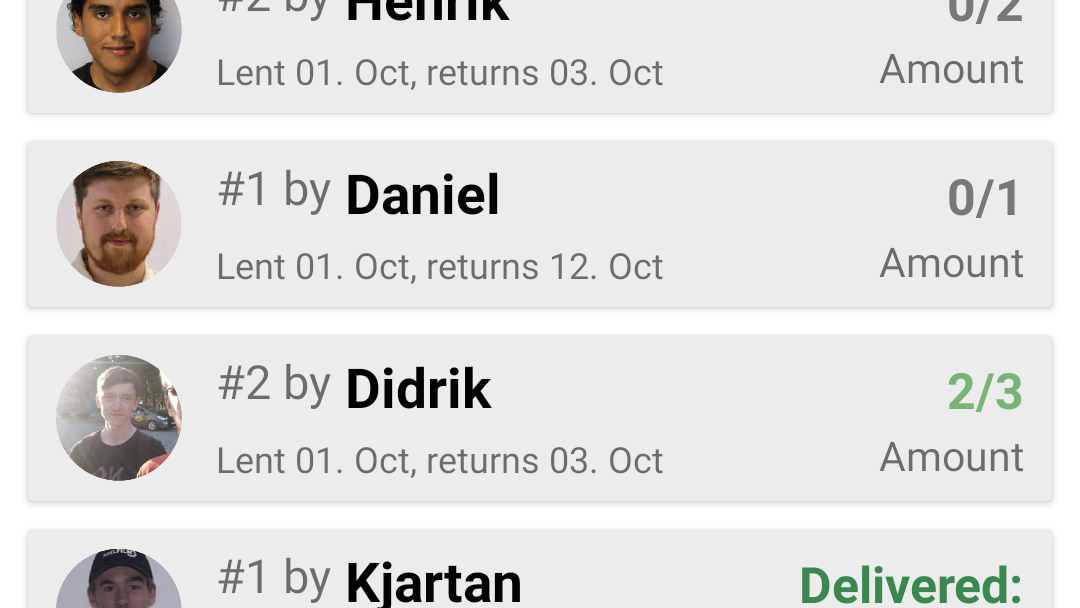
Lend-outs
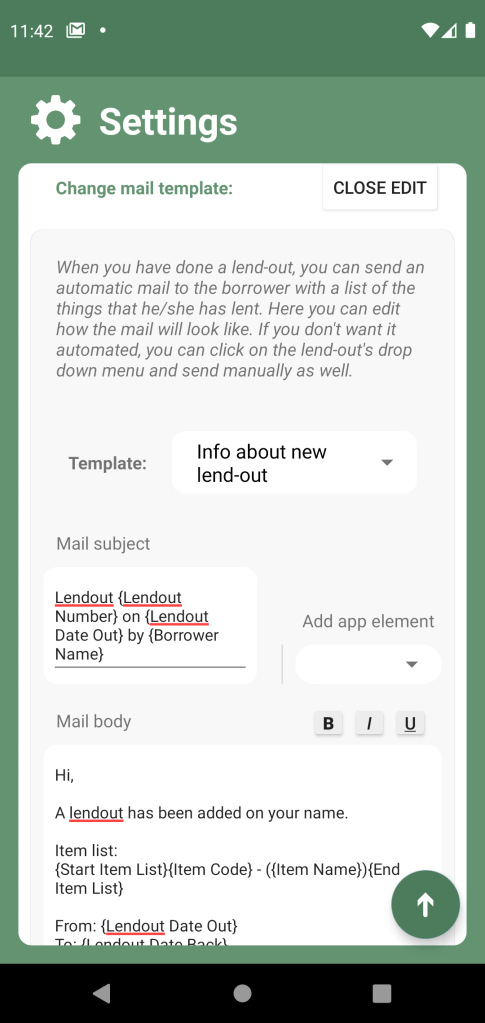
A lend-out contains fundamentally of a start date, a date of return, a borrower and a list of things. If you want to, you could also add a contract that the borrower have to sign on lend-out, and you can also send an email to the borrower with information about the lend-out.
Statuses
All items, borrowers and lendouts have statuses, and these are stored as a history list.
To-dos
If you need a list for to-do’s that are for your lend-out storage specifically, you can use our To-do tool. All the do-do’s can be found in the information page, but you can add a to-do from basically any page, if you either click an Item, a Borrower or Lend-out, and press “Add to To-do list”. This will add a new To-do with either the Item, Borrower or Lend-out you chose as a reference to that to-do.
How to import to database
To import to database, you’ll need to find the import button in the Settings page. Choose a file, then import.
First choose what list you’re adding, whether it is borrowers, items, or perhaps to-dos. Now, you can start aligning the data to the right column. If your file has column names as a first row, this will be quite easy. If not, and you have some empty fields, you can roll through each line of your file by pressing “Next line” until you find a field that is not empty.
Before you submit after aligning data to each column, there may be some more options you need to take a look at. Press “More Options”.
Most of these settings should probably stay the same.
Reviewing results after submitting is good just to check what the errors may be, so you can fix them.
If you have column titles as first row, like “NAME;CATEGORY;CODE;INFO”, you can check the “Skip first line when submitting” so you won’t import just column titles.
Stock column separator is a semi-column: ” ; “. We recommend this since text may have commas in them, but there are export options in some programs when making a CSV file, where you can quote a value that contain commas. The stock quote sign is “. As of yet it is not supported to change this value, but hopefully there are rare cases where this value needs to be changed.
Underneath those options will be a “Check out file data” button. Here you can see how the app has read the file. Here you can check if the app has confused how to read the data, and where it has worked.
Last thing you can do is to add date formats, and even better with specific languages. Press the plus button, and write how the date format looks in your data. Checking the file data is also neat to figure out exactly how the date looks.
It may be that the stuff you import will not completely work on the first try, but don’t worry – as long as “Review results after submitting” is checked, you’ll get a list of what is going to work and what failed. You can then check the errors, and go back and adjust things before you finally import anything. You can also choose to import those that works, and later go back and try again. Just remember that on the second time, you will then have all of the ones already imported in the failed list, since they cannot be imported twice.